Loading ခဏစောင့်ပါ


Loading ခဏစောင့်ပါ
Exp LaneFighterAssassinDifficulty 50/100
All ranks, this week.
Written by players. Their views, not ours; names are masked.
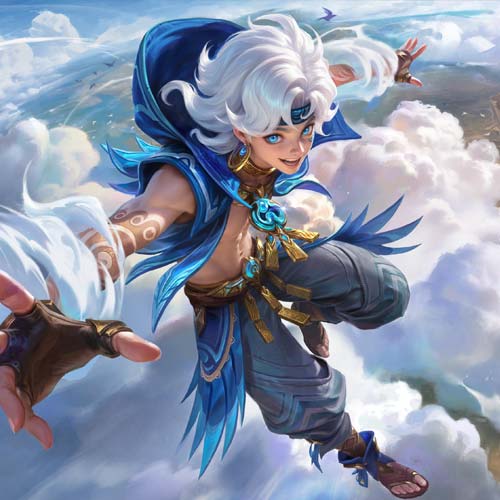
Use Sora in Rank game for better win rate. Or ban him if you're not going to use it so the enemies cannot dominate you especially when the enemy is good at using Sora.
For Magic damage enemies. If the enemy hero that are dominating you or the team is magic damage, I'll recommend this build.
Use Flicker for chasing enemies or surprising enemy with a flicker-ultimate(cloudy) combo.
Talents: #511, #721, #731
For sustainability and damage.
Always try to maximize Sora's skills. You can use it for pick-up. Always try to hit every skills in ultimate form to easily stack.
Good with Tigreal: Tigreal can use his ultimate to set enemies and sora is going to respond with his ultimate.
Watch out for Fanny: Fanny can easily counter Sora if you use it right. You can easily dodge Sora's skills to prevent him from stacking and ending up wasting his ultimate and you and your team can easily pick up Sora if Sora doesn't have ultimate, because Sora is dependent to his ultimate. But make sure to catch him fast because Sora's ultimate have lower cooldown especially in mid and late game.
Learn Sora through understanding, not memorization. This guide teaches modular itemization, Fold Point teleport strategy, and adaptive decision making for all game phases. Suitable for players serious
High hp and fst cd
To tk crowd control from distance
Talents: #111, #721, #331
To give damage and give lifesteal
Tk ult n and pull stun them wit second skill and use 3 skill do gain stack
Good with Sora: Big advantage wit hight hp and high dmge
Watch out for Diggie: Diggie ult is the worst
like for 150 dias 💎💎
this build is good for sustainability in team fights
this battle spell is good for set and chasing enemies
Talents: #311, #521, #133
this emblem is good for setting and chasing enemies
if you choose electric click first skill dont move then second then second again to get close to the enemy
If you choose cloud use first skill then second and when theres 2-5 enemies use vacuum set on sora, first activate your cloud then time it with the vacuum then flicker
Good with Phoveus: idk
Watch out for Lukas: idk
For point but feel free to read
Tanky for cloudy form and deal good damage for thunder form
Good for montage
Talents: #511, #721, #731
Strong Spell vamp and tanky
This hero is very good
Good with Phoveus: Same
Watch out for Badang: Yeah
Updated 30 Sept, 21:24 (Myanmar time). Unofficial statistics from Mobile Legends’ public data, for information only. Not affiliated with or endorsed by Moonton. Hero names and images belong to Moonton.
This build maximizes Sora's modular kit through balanced aggression and survivability. Core Philosophy: Each item solves a specific problem while amplifying Sora's unique mechanics including Fold Point teleport, Overdrive Mode, and Resonance stacks. Key Items: War Axe is the foundation. It provides sustain through HP, stacks penetration with multi-hit combos, and synergizes perfectly with Sora's rapid skill weaving. Hunter Strike is the game-changer. It gives 160 AD plus 50 percent movement speed burst after 5 hits, enabling unpredictable engages and escapes. Combined with Fold Point teleport, Sora becomes impossible to kite. Malefic Roar ensures late-game relevance. The 40 percent physical penetration melts tanks and bruisers who stack defense, while Fracture debuff removes 40 percent healing to prevent sustain counters. Blade of Despair provides execute power. The 25 percent damage bonus to low HP targets synergizes with ultimate reset mechanic for chain kills in teamfights. Immortality offers safety net. The revive passive prevents game-ending mistakes and enables aggressive positioning without fear of instant deletion. Build Logic: Early sustain from War Axe, mid-game mobility from Hunter Strike, late-game penetration from Malefic Roar, execute damage from Blade of Despair, and insurance from Immortality. Clear power spikes occur at items 2, 3, and 5. Situational Swaps: Replace Malefic Roar with Athena's Shield against heavy magic damage. Swap Immortality for Que
Flicker provides essential spatial extension for Sora's modular kit. It enables unpredictable engages through Fold Point teleportation, guarantees escape from dangerous situations, and allows you to dodge critical skillshots like Franco hooks or Eudora stuns. Combined with Sora's Hunter Strike movement speed and Overdrive mode, Flicker makes you nearly impossible to catch while ensuring you can always close the gap on priority targets. Use Flicker to extend your engage range after placing Fold Points, or as an emergency escape when your ultimate is on cooldown.
Talents: #511, #721, #731
Sora's kit revolves around sustained aggression and multi-hit combos. Fighter Emblem provides the perfect balance of penetration, sustain, and survivability. The lifesteal from Festival of Blood synergizes with War Axe and Resonance Pulse, allowing you to trade favorably in extended fights. Bravery's HP boost is crucial for surviving the initial burst when diving enemy carries.
Priorities: - Last hit minions for gold advantage (target 80 percent accuracy) - Use Skill 1 for wave clear and poke - Place Fold Points in river brushes for vision control - Avoid extended trades before level 4 Level 4 Power Spike: - Ultimate unlock enables all-in potential - Look for kill opportunities when enemy overextends - Rotate to turtle at 7:30 for position prep Laning Precautions: - Stay 700 range if enemy jungler missing - Ward both river brushes before pushing - Don't use ultimate just for wave clear - Track enemy EXP laner cooldowns Team Fight Strategy: - Wait for tank to initiate - Use Fold Point to flank from side brush - Target enemy marksman or mage first - Save Flicker for escape if outnumbered
Priorities: - Split push side lane when team groups mid - Use Hunter Strike movement speed for fast rotations - Secure turtle control with team - Take tower plates for gold advantage Power Spike: - War Axe plus Hunter Strike completed - Mobility allows 2x faster rotations than meta - Can win 1v1 duels against most heroes Laning Precautions: - Push wave before rotating (dont miss gold) - Check minimap every 10 seconds - Track enemy jungler position before engaging - Maintain 1 active Fold Point in flank brush Team Fight Strategy: - Rotate to turtle fights 30 seconds before spawn - Use Torrent Form to initiate and group enemies - Delete enemy backline with Thunder Form burst - Priority: Turtle secure plus tower plates plus kill participation above 60 percent
Priorities: - Full build completed (maximum power) - Lord control and high ground siege - Flank positioning (never walk mid lane alone) - Execute low HP targets with Blade of Despair Power Spike: - All 6 items completed - Immortality provides second life in teamfights - Can delete any hero in 1 combo Laning Precautions: - Always position in side brushes - Wait for vision of all 5 enemies - Let tank initiate first (never first blood) - Track enemy CC cooldowns before diving Team Fight Strategy: - Wait in flank brush for engage - Torrent Form when tank initiates to group enemies - Swap to Thunder Form to delete backline - Use Flicker to chase fleeing targets - Priority: Lord secure, high ground push, base destroy - One mistake equals game over, play carefully
Good with Tigreal: Tigreal and Sora create devastating engage combos. Tigreal's Flicker plus Implosion groups enemies together, while Sora uses Fold Point teleport to instantly join the fight. Sora's Resonance Pulse applies Fracture to grouped enemies, and his Thunder Form burst deletes them instantly. Tigreal provides the CC lockdown Sora needs to safely dive backline. This synergy works because Tigreal initiates a
Watch out for Atlas: Atlas's Perfect Combination ultimate pulls enemies together, creating perfect targets for Sora's area damage. When Atlas uses Fatal Links, Sora teleports via Fold Point behind the grouped enemies and uses Torrent Form to pull them tighter. The combined CC chain prevents enemies from escaping while Sora's Blade of Despair executes low HP targets. Atlas provides the setup, Sora provides the cleanup.
Watch out for Gatotkaca: Gatotkaca's Unbreakable taunt forces enemies to attack him, while Sora flanks from the side brush. When Gatotkaca uses his ultimate to jump into the enemy team, Sora uses Fold Point teleport to instantly follow up. Gatotkaca absorbs damage and CC, allowing Sora to dive the backline safely. This works because Gatotkaca creates chaos while Sora exploits it.
Watch out for Nana: Nana's Molina's Smooch transforms enemy carries into harmless creatures, making them easy targets for Sora's burst combo. While the enemy is transformed, Sora uses Thunder Form untargetable dash to delete them before they can react. Nana's crowd control provides the window Sora needs to execute priority targets. Simple but effective pick potential.
Watch out for Pharsa: Pharsa's Feathered Air Strike reveals enemy positions globally, allowing Sora to plan Fold Point placements strategically. When Pharsa uses her ultimate to poke and reveal enemies, Sora teleports to the revealed targets and deletes them. Pharsa provides vision and wave clear while Sora provides assassination. Strong map control synergy.
Watch out for Khufra: Khufra is Sora's hardest counter. His Bouncing Ball (Skill 2) interrupts Sora's Fold Point teleport and dashes, dealing massive damage and preventing mobility. Khufra's passive reduces Sora's movement speed significantly, making it impossible to kite or chase. His ultimate suppresses Sora completely, locking him down for team follow-up. Sora's untargetable ultimate is the only escape, but Khufra's
Watch out for Franco: Franco's Terror Hook catches Sora out of position before he can activate Fold Point teleport or untargetable ultimate. Once hooked, Sora is locked down and bursted by Franco's team before using any skills. Franco's ultimate silence prevents Sora from casting abilities. Sora's mobility is useless if he gets hooked. Play safe behind minions and wait for Franco to miss hook before engaging. Build Tou
Watch out for Martis: Martis counters Sora through superior sustain and CC immunity. His Ashura Aura makes him immune to crowd control during ultimate, negating Sora's Fracture debuff and team CC. Martis outscales Sora in late game with higher sustain from lifesteal and tankiness. His Decimate slash deals true damage that bypasses Sora's defense items. Sora struggles to burst Martis before he heals back. Build Malefic
Watch out for Phoveus: Phoveus's Fearful Thorns passive deals damage when enemies dash, punishing Sora's Fold Point teleport and Skill 2 mobility. His ultimate locks Sora down completely, preventing escape or repositioning. Phoveus has high sustain from spell vamp and tankiness from HP stacking, making him difficult for Sora to burst. His anti-dash kit specifically targets mobile heroes like Sora. Build Malefic Roar for
Watch out for Valentina: Valentina copies Sora's ultimate with her I Am You ability, gaining access to Thunder Form and Torrent Form. She can outburst Sora using his own kit against him, especially if she builds magic damage items. Valentina's high magic damage bypasses Sora's physical defense items. Her crowd control and sustain make extended fights unfavorable for Sora. Build Athena's Shield for magic defense and don't
Watch out for Layla: Layla has no mobility or escape skills, making her an easy target for Sora's Fold Point teleport and Thunder Form burst. Sora can delete Layla instantly before she reacts. Layla's short range means she cannot poke Sora safely. Free pick potential every teamfight
Watch out for Hanabi: Hanabi relies entirely on positioning and has zero escape tools. Sora's unpredictable Fold Point placement allows flanking from any angle, deleting Hanabi before her team can peel. Her immortality passive does not save her from Sora's sustained damage. Easy target for execute combos